Showing posts with label glitter. Show all posts

Thursday, 24 July 2014

Mellow Yellow


Not all cupcakes have to be pastel pink or baby blue.

For the parents leaving their baby’s gender a surprise, a batch of summery yellow and muted grey cupcakes keep the gender safely a secret.


Monday, 3 February 2014

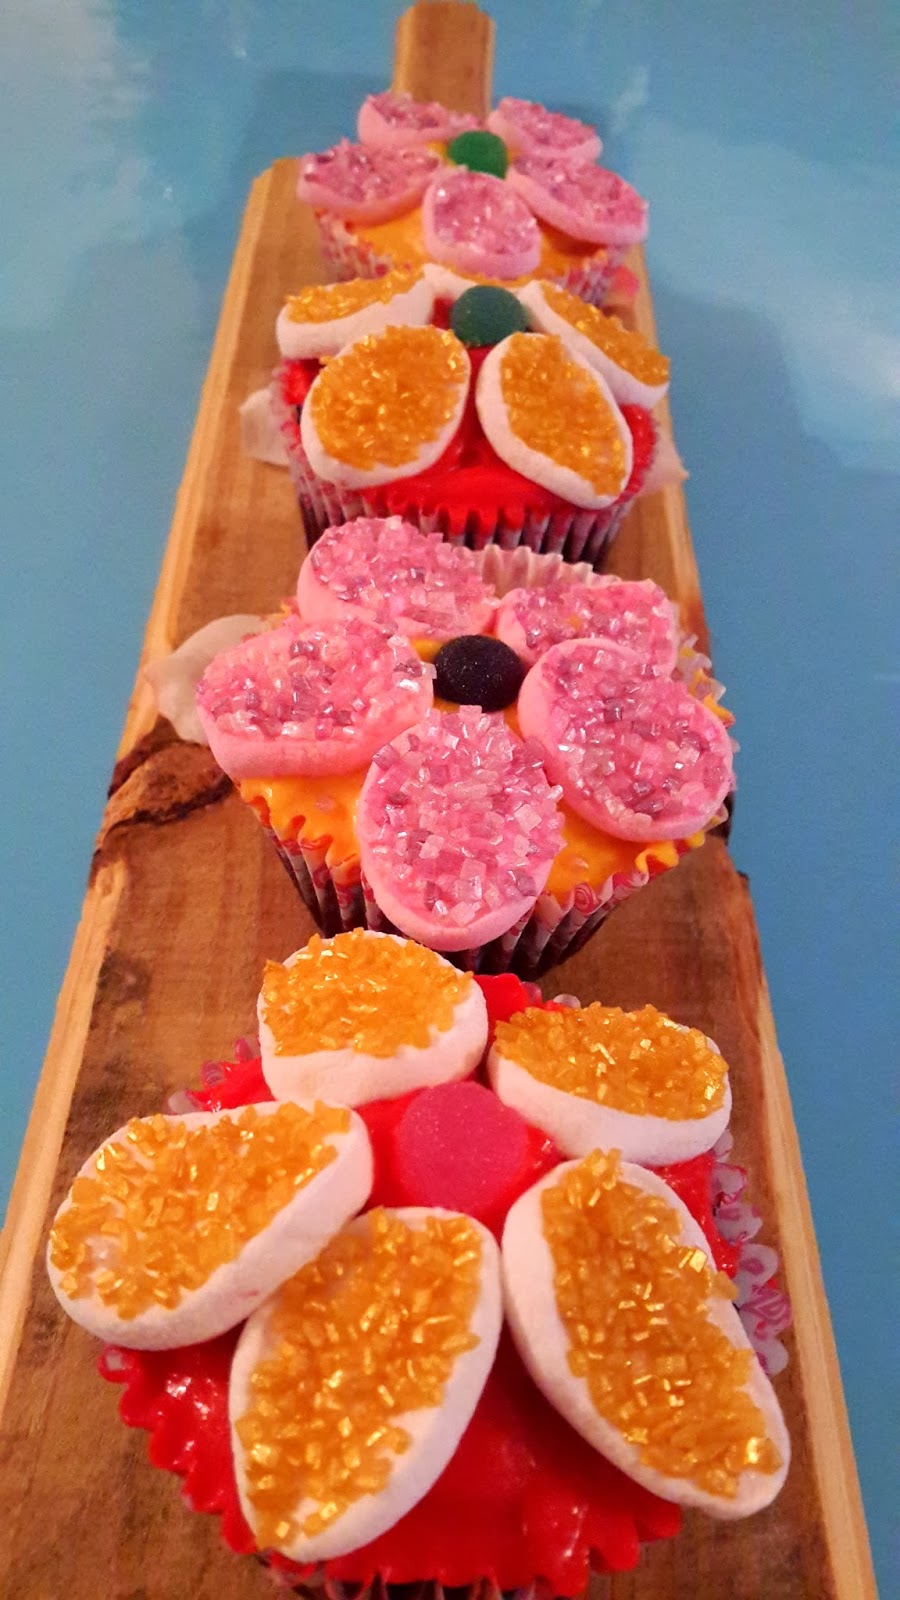
Marshmallow Flowers


Looking for an easy-peasy way to decorate your cupcakes? 

I added a touch of fun to these cupcakes by simply using marshmallows to make flowers.

Firstly ice your cupcake. Then cut your marshmallow into thin petals. I managed to cut marshmallows into 4, sometimes 5, slivers.  The slivers are then super sticky so I dropped them into sugar crystals which stuck easily, just to give them a sparkly look.

Assemble marshmallow petals around a jelly tot on your cupcake, and voila, a flower!

How fabulously easy!


Monday, 9 December 2013

It's beginning to look a lot like christmas...


Christmas is all around, so obviously my nails would follow suit and get dressed up for the season...

Friday, 6 December 2013

Baby Cakes


It was one of my best friend's Baby shower this past weekend so, as we don't know whether she's having a little boy or girl,  I baked up a batch of gender neutral white pearly cupcakes...


loving her adorable preggy belly!

Thursday, 1 August 2013

Kisses...

waking up in winter is always difficult, but it's also always worth it.
Life has kept me pretty busy lately,and unfortunately my blogging had to take a quick break. To make up for my quiet, heres a few pics of what I've been up to lately...

Also, I am now on instagram and updating that regularly, so follow me @tipsytart for more pics and fun from my day to day adventures...


Behind the scenes on our latest shoot. Working in the advertising industry sure does have its perks, like planning and shooting for the upcoming spring season... definitely my favourite part of the job.

Just some of my mani's lately..


We may be in the middle of winter, but the weather has been so warm lately that beach days and sundowners are still on the agenda.
 

My sister came up from Cape town recently so we squeezed in lots of family time. Chilling with my siblings is always good fun...

Bijoux my little baby. Because I now live in an apartment I can't have any pets, but recently I was feeling horribly ill so went home (nothing's quite as good and Doctor Dad and Nurse Mum) and had this little treasure
spend all day cuddled in bed with me...


Sorry I've been so quiet.. kisses!

Monday, 10 June 2013

Pink - it was love at first sight...


There’s nothing like a little overdose of pink in this cold winter weather, and a promise of good things from the always optimistic and super girly Magic 8 Ball, to make everything good!


Tuesday, 14 May 2013

Melted Marshmallow Fondant

A mix of marshamallow fondant and butter icing - I had both so decided a mix would be fun...

When I spotted this recipe here, I just knew I had to give this icing a try. I love the look of fondant cupcakes, but really, I do not enjoy the taste. I'd pick a butter icing over fondant any day, but show me a marshmallow fondant and that's a whole new story!

This recipe does take a bit longer than your usual butter icing, but for special occassions it might just be worth it.

For the cupcakes recipe see here.
 

Ingredients
225grams white marshmallows, cut up.
2 Tbls. water
450grams icing sugar
Butter to grease hands

Directions:
First melt marshmallows and in microwave for 30 seconds at a time. Mine took one minute until melted.


Melted looks something like this


Stir 3/4 of the powdered sugar into the marshmallow mixture, then knead in the remaining 1/4 until it is all incorporated into the mixture . I used my mixer, with the dough attachment. Note: be sure to grease your hands and counter before dumping mixture from bowl!


Add colour to your fondant. I split mine into two batches and just coloured one half. Then Knead Knead Knead until it is soft and shiny. You’ll need to grease your hands again most likely. If it starts to feel a bit dry, add 1/2 tablespoon water at a time until it feels soft and pliable – then keep kneading.


Grease the outside of the ball and double wrap in saran wrap, then put in a ziplock bag to keep it moist.


To get the frosting to stay on your cake / cupcakes, you’ll need to ice them with a butter icing. Delicious recipe here. This acts as a ‘glue’ to get the frosting to stick.

Dust your counter with powdered sugar. TIP: if your fondant is a bit hard, throw it in the microwave (still covered) for 5 – 10 seconds until more pliable.
Roll out your fondant until it is about 1/8 inch thick. 


Using cookie cutters, try find a size that is just bigger than your cupcakes, and cut the round tops. I also cut out little hearts and circles as decor
When decorating, you can just add a dab of water to your heart and gently place it on.


Monday, 18 March 2013

Red Velvet


I've never quite understood the obsession with Red Velvet Cupcakes that the world seems to be going through. Personally, a rich chocolate cupcake or light berry cupcake are up on my favourites list, but I realised that I couldn't in all honesty call myself a baker if I'd never tried to make these. 
So I did.
And they turned out spectacularly. 
In fact I may just make them again. If everybody wants Red Velvet, well then I am happy to oblige...

As with most treats I bake, this recipe is pretty easy to follow and doesn't require too much fancy skill...

Red Velvet Cupcakes
Ingredients:
2 1/4 cups cake flour
1/3 cup unsweetened cocoa
1  teaspoon salt
1 1/3 cups oil
1 1/2 cups sugar
2 eggs
2 bottles food colouring (80ml)
1 teaspoons vanilla
3/4 cup buttermilk
1 1/2 teaspoons baking soda
2 teaspoons white vinegar

Method:
1.  Preheat oven to 180C.  Prepare cupcake pan with liners. 

2.  In a large bowl whisk cake flour, cocoa and salt, and set aside.

3.  In the bowl of an electric mixer (fitted with the whisk attachment), beat oil and sugar until well blended.  Add eggs one at a time, and continue beating.  Add food colouring and vanilla and mix well.

4.  Add flour and buttermilk alternately, in two batches.  Scrape down the sides of the bowl as needed.  Mix just enough to combine.

5.  Place baking soda in a bowl or cup, add vinegar and stir (it will foam and expand).  Add to cake batter and beat for 10 seconds.

6.  Fill cupcake liners 2/3 full, and bake for  20-24 minutes.  

This recipe will yield about 24 - 26 cupcakes

Original Recipe taken from here 

Cream Cheese Icing
Ingredients:
1 tub (about 230g) Cream cheese (cold - directly from fridge) 
1/3 cup butter ( room temperature)
1tsp Vanilla Essence 
4 - 6 cups Icing sugar

Method:
1.  Place butter in a large mixing bowl and beat until smooth. Add cream cheese and blend until fully combined, about 30 seconds.

2.  Add vanilla extract and powdered sugar (one cup at a time) while mixing.  Increase to medium speed and beat until it begins to get fluffy. Keep adding sugar until you get the desired consistency. I find on hotter days I need to add more sugar as the cream cheese is a lot more melty.
 

3.  Frost cupcakes and decorate if desired. 

Ingredients. I always first lay out all my ingredients before I even start. This helps avoid those awful situations where you realise you are missing an ingredient and have to stop everything to pop out to the shops.

Lovely red colour

Fresh out the oven

mmm...