Tuesday 5 August 2014

Peanut Brittle Caramel Swirl


A friend of mine recently wanted to impress the mother-in-law with some pretty cupcakes for her birthday party - but not just your typical pretty sparkly ones, but something a little more sophisticated, so I suggested combining Peanut Brittle over a vanilla and caramel swirl icing, topping a moist chocolate base. 

The result was delish! If ever my friend was being cut out of the will, she is quite sure she is now back in! 


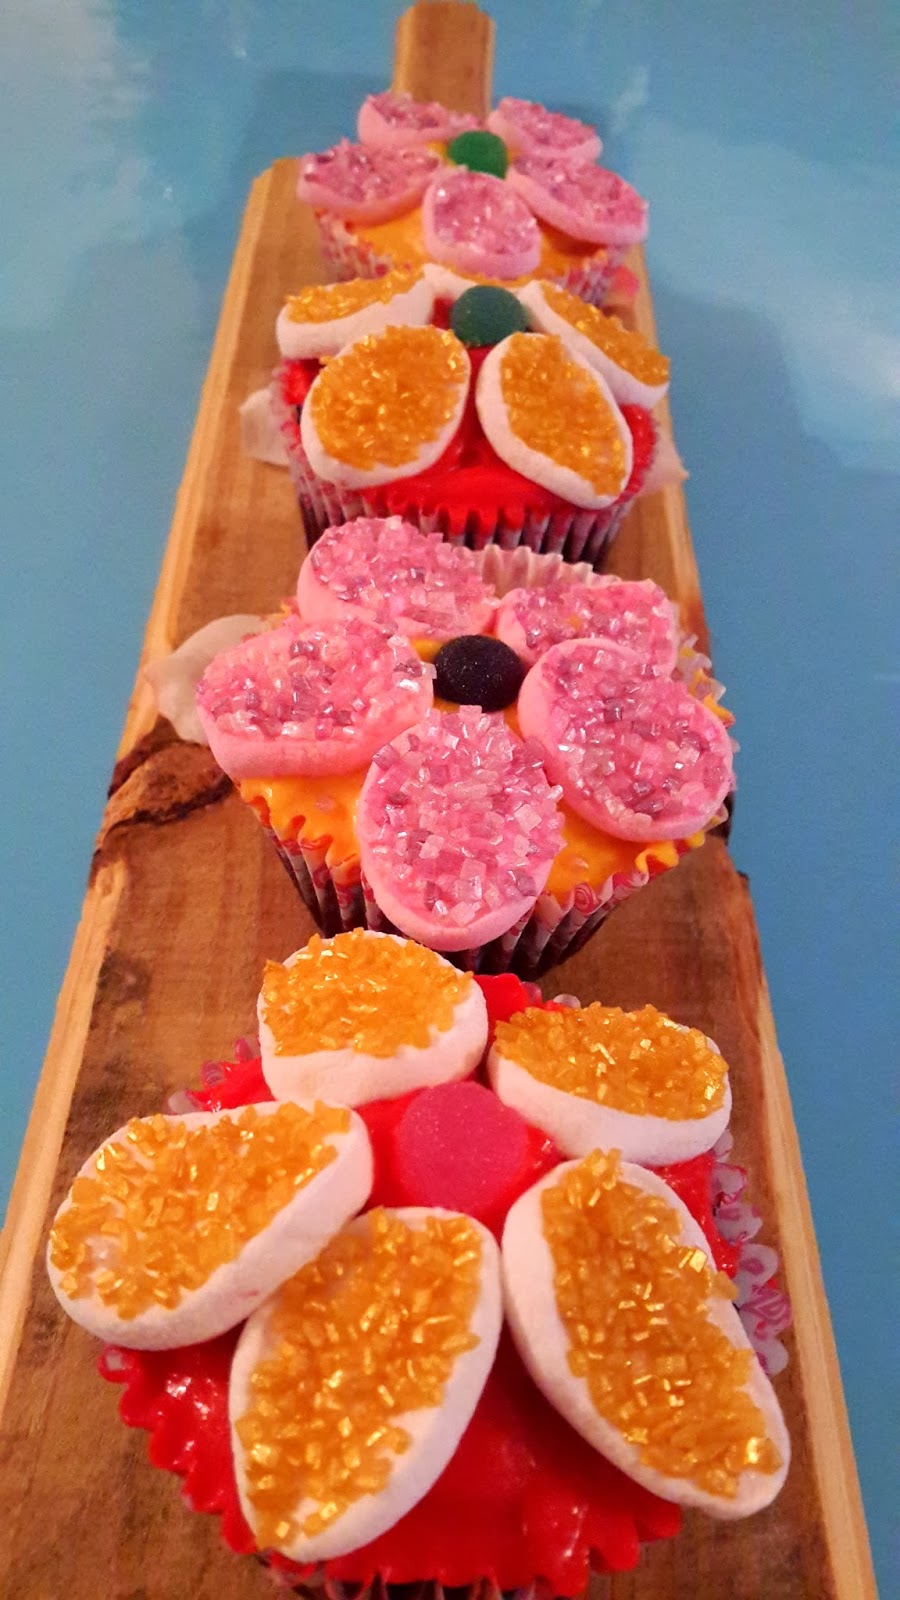
For the base I used my regular chocolate cupcake mix but for the icing I made my favourite cream cheese topping, then split the icing in two and added a dash of caramel essence to the one half. (As they were wanting something smarter I opted for the essence as opposed to actual caramel treat as this may have been too sweet.) Then gently eased both the vanilla and caramel icing into my piping bag and iced them both at ones to create the swirl affect.

Thursday 24 July 2014

Mellow Yellow


Not all cupcakes have to be pastel pink or baby blue.

For the parents leaving their baby’s gender a surprise, a batch of summery yellow and muted grey cupcakes keep the gender safely a secret.


Tuesday 22 July 2014

Floral Feature


pic from here

My spare room is looking very spare. It’s one of those rooms that I have every intention of making amazing, but then real life kicks in (as do budgets) and realistically, time is better spent on rooms we use regularly. 
 
But that being said, I had to do something to add some pretty to a pretty stark room.

And then my amazing team at work inspired me!
On a recent shoot for a client of mine, we had our model pose on a bed of flowers. 
 Simple, striking. I loved it.


So I took inspiration from my creative team of geniuses and made my own floral frame for my spare room.
work in progress...

All it took was a frame, some polystyrene board, and a selection of fabric flowers.
Simply push them into the polyboard, pin down the tricksy ones that want to jump out (there were a few) and voila, a quick and effective flower wall feature.

Final pics to follow soon
xx

Monday 24 March 2014

Girly Pink Cupcakes


A friend recently ordered a batch of girly pink & white swirl cupcakes for her sisters surprise baby shower.

The mom-to-be very unsuspectingly walked into restaurant filled with all her dearest and nearest all there to celebrate the upcoming birth of her little princess.

If you have a baby shower coming up and are looking for cupcakes, feel free to email me tipsytart@gmail.com and I'll be happy to see what we can do for you :o)

Thursday 20 March 2014

Pop it like it's hot...


Cake pops!
They're the perfect amount of cake in one easy go. (okay okay my chocaholic friends may disagree, saying bigger is better, but for me, these little balls of chocolatey goodness are the prefect size).


I however do not put my pop on sticks. I suppose this defeats the point but I just can't. You know how some people can't bear the sound of nails on a black board? Well I cannot even handle the thought of a wooden stick between my teeth. Just writing this has set my skin on edge, giving me goosebumps over my entire body. I don't know why. That and cottonwool. The thought of cottonwool between my teeth.. okay no, this  is too much for me to even write.
So back to stick-less cake pops.

For my cake pops I use a cake pop tin as opposed to baking the cakes then breaking them up and crushing them into balls. This is quick and easy and much less messy...

Chocolate covered, chocolate, stick-less, cakepops 

For the cake pops I follow this delicious chocolate cake recipe below.
Once they are properly cooled, it's time to prep the chocolate.  

Melt your baking chocolate ( I use 1 slab, but the slab is VERY big so its enough) in the microwave. Leave just one block of chocolate un-melted and stir this in at the end. I read that this is meant to help the chocolate keep it's shine and correct consistency due to some scientific reaction,  but I'm no scientist, so I can't actually be sure.  I just do it anyway...

Once the chocolate is melted and you have stirred in the one hard block, add your powdered food colouring. (I used black in support of our local Rugby team's colours as my friends were all coming over for the game). Specifically use powdered colour so that you do not add liquid to the mixture. 


Roll pop in the chocolate

Allow chocolate to run off, so that its not too thick.


And then it's as easy and sticking a wooden skewer into your cooled cake pop, swirling it in the runny chocolate, and delicately dropping into onto a tray covered in parchment paper. I do a few pops, decorate,  then move them into the fridge as you want to keep them cool so that the chocolate hardens.

Drop onto tray and decorate.

Refrigerate for at least one hour then serve!

Chocolate cake pops
Ingredients

2 cups sugar
1 3/4 cups all purpose flour
3/4 cup unsweetened cocoa
1 1/2 teaspoons baking powder
1 1/2 teaspoons baking soda
1 teaspoon salt
2 eggs
1 cup whole milk
1/2 cup vegetable oil
2 teaspoons vanilla extract (best quality available)
1 cup boiling water

Directions

  • Heat oven to 180C. Grease cake pops tin.
  • In a large mixing bowl, stir together sugar, flour, cocoa, baking powder, baking soda and salt.
  • Add eggs, milk, oil and vanilla.  Beat on medium speed for one minute.
  • Stir in boiling water (the batter will be thin, don’t worry, this is right).
  • Fill bottom half of cake pops tin entirely, then close with lid.
  • Bake pops for approximately 10-12 minutes.
  • Cool completely on wire rack before coating in chocolate.
 
The Boyfriend wanted to help so stepped in as chocolate dipper.

Friday 7 February 2014

We're all mad here...


My family are a bunch of nutters so when we decided we needed to have a family photo shoot (because all our pics are always missing at least one person - the one taking the photo) the most 'sensible' theme was a mad hatters tea party.

Raining Marshmallows!

We had absolutely zero inclination towards a typical blue jeans, white t-shirt, soft smiles on the beach shoot, because that's just not us.

Derryn Semple took some photos of Dane and I a while back (see them here & here) and we knew she was the perfect lady for the job.

Derryn beautifully captured the fun yet silly side of my family and let us misbehave while she was shooting. (And just like before, her humour and relaxed attitude made it easy for everyone to forget their nerves in front of the camera and just have fun!)


CUPcake anyone?

Spot of tea dears?


My gorgeous sister
 More pics from the shoot here.

Wednesday 5 February 2014

Hello Deer...


A friend recently got her ears pierced and has started needing somewhere small to keep all her earrings so I thought I'd make her a special little dish to store them in.

For this I needed:
Heart shaped dish (I got mine from here)
Children's plastic animal (any toy shop)
Spray Paint
Super Glue

Firstly I spray painted my little deer a bright gold.  (Actually The Boyfriend helped as he got very excited when I brought home spray paint. There's just something about it isn't there?)
Once my golden deer was properly dry, we just super glued him in place and ta-da. Very simple yet very cute jewellery dish!

The thing with DIY is that it need not necessarily be hard. This took minutes (and drying time) but is far prettier than a plain dish or a ring holder dish from the local stores.

Monday 3 February 2014

Marshmallow Flowers


Looking for an easy-peasy way to decorate your cupcakes? 

I added a touch of fun to these cupcakes by simply using marshmallows to make flowers.

Firstly ice your cupcake. Then cut your marshmallow into thin petals. I managed to cut marshmallows into 4, sometimes 5, slivers.  The slivers are then super sticky so I dropped them into sugar crystals which stuck easily, just to give them a sparkly look.

Assemble marshmallow petals around a jelly tot on your cupcake, and voila, a flower!

How fabulously easy!


Monday 6 January 2014

Art Class Nailed


For new years I obviously wanted to paint my nails accordingly. But everything seemed done and somewhat bleh!
So I whipped out the old art books and drew inspiration from the masters. (How silly that I'd never thought to look to artists for artistic inspiration. In retrospect it seems like the most obvious direction and source of ideas)

Post-impressionism is an era of art that really appeals to me. Let me first be honest, I am no art curator. I'll definitely confuse Monet and Manet and couldn't name their works, but I am able to appreciate beautiful art. 


So, post-impressionism, often characterised by thick energetic brush strokes and bold colours is, for me, most often, a visual feast. It does not clearly depict the image but often allows the viewers to create their own impression.

Drawing from this I created my post-impressionism inspired firework nails. 


These were somewhat time consuming, especially as I only had one paint brush, but based on their thick strokes, were relatively easy to execute.

Unfortunately I didn't take step by step pics, but start with a deep dark blue base colour (I used essie midnight cami), then once dry, apply the colour strokes to each nail, then after that the silver strokes over and in between the colours , then the glitter layer and finally a thick top coat to seal in all your hard work. 

But why not rather let your inner artist out and do it whichever way feels right to you :o)