Wednesday 26 September 2012

Holiday Snaps (part 1)


Over the long weekend The Boyfriend and I packed our bags and boarded a plane to Cape Town. This trip was a mix of celebrating my birthday (yay), visiting my sister (even bigger yay), and just having a much needed short holiday.
My sister was a fabulous host and took us adventuring around Cape Town, from the super high end to the really quirky, and super tasty sides of the city…

Dane and I found ourselves with some time to spare so he spoiled me with oysters and crispy wine while watching the boats cruise by. What better way to ease into my birthday weekend! (I feel birthdays are too much fun to confine to just one day!)

El burro is a quirky Mexican restaurant, but unlike most Mexican spots, it is not dirty and oily. The food was delicious (we had build-your-own burritos) and the décor a visual feast… coupled with ice cold beers and the sunshine, it made for an afternoon well spent.

No trip to the cape is complete without a morning trip to the Biscuit Mill, where once again, we found ourselves eating! The biscuit mill sells some of the tastiest treats, brightest flowers, and an assortment of drinks that have you consuming more than you really should. Oh well, when I’m on holiday all healthy eating and wise food choices go on holiday too.


Monday 24 September 2012

Natural Shine


Recently BCBG went for natural nails at New York fashion week and this got me looking into it the idea of going neutral. I  then also came across City Girl's post on neutral nails she was considering for her wedding so decided to give it a try.

What I used:
Neutral fleshy colour
Glitter
Top coat

As always, first apply base coat (to avoid staining) and then follow with a coat or two of your natural colour. While this is still wet, using a paintbrush, dip the dry brush in the glitter and then gently dust over your nail.
Once dry, paint over with top coat.

Note: The boyfriend hated this look on me. He moaned that the natural colour made my nails look cigarette stained and unflattering. Maybe I need a better nude? I'm no giving up on this yet.

Friday 21 September 2012

Thursday 20 September 2012

Naughty 90's, Churchill House


Fancy a cup of strong coffee, a decadent chocolate muffin/brownie served in a terracotta pot or maybe, on the healthier side, a light cous cous salad tossed with roasted veg, all while perusing delightful antiques, gorgeous vintage jewellery and unique bits and bobs? Then you HAVE to stop by naughty 90's in the Churchill House.

Every time I visit I stay far longer than necessary, walking through the maze of overflowing rooms. I quite literally feel like Alice, but instead of falling down a rabbit hole, I have fallen into a treasure box and have no intention of finding my way out...   


Find Churchill House on Churchill Rd, off Windermere Rd.

Wednesday 19 September 2012

From Pickles to Petals


I love collecting Jars. I just can’t bring myself to throw them away. I use them for storage, sorting and now for décor too.
In a few quick brush strokes, turn basic glass pickle jars into pretty vases.
I recently painted the soles of my heels, so with my left over paint, primer and modge podge I started having some fun on my spare jars.
What I used:
Primer
Paint
Modge podge

First the jars had to be cleaned and stripped of the nasty glue.

I then painted them with primer. To be honest, I don’t know whether I needed to, but I had some left over and figured that I might as well use it. 

Once dried, I painted 2 layers of acrylic paint.And then once that was dry I painted with modge podge just to give it a glossy finish. 

Lastly I pulled out my washi tape and had some fun wrapping it around the jars.

Tuesday 18 September 2012

Dangerously Decadent


Warning: Do not attempt this recipe if you are dieting or trying to watch your weight. These cookies are devilishly decadent and you may find yourself having more than just one…

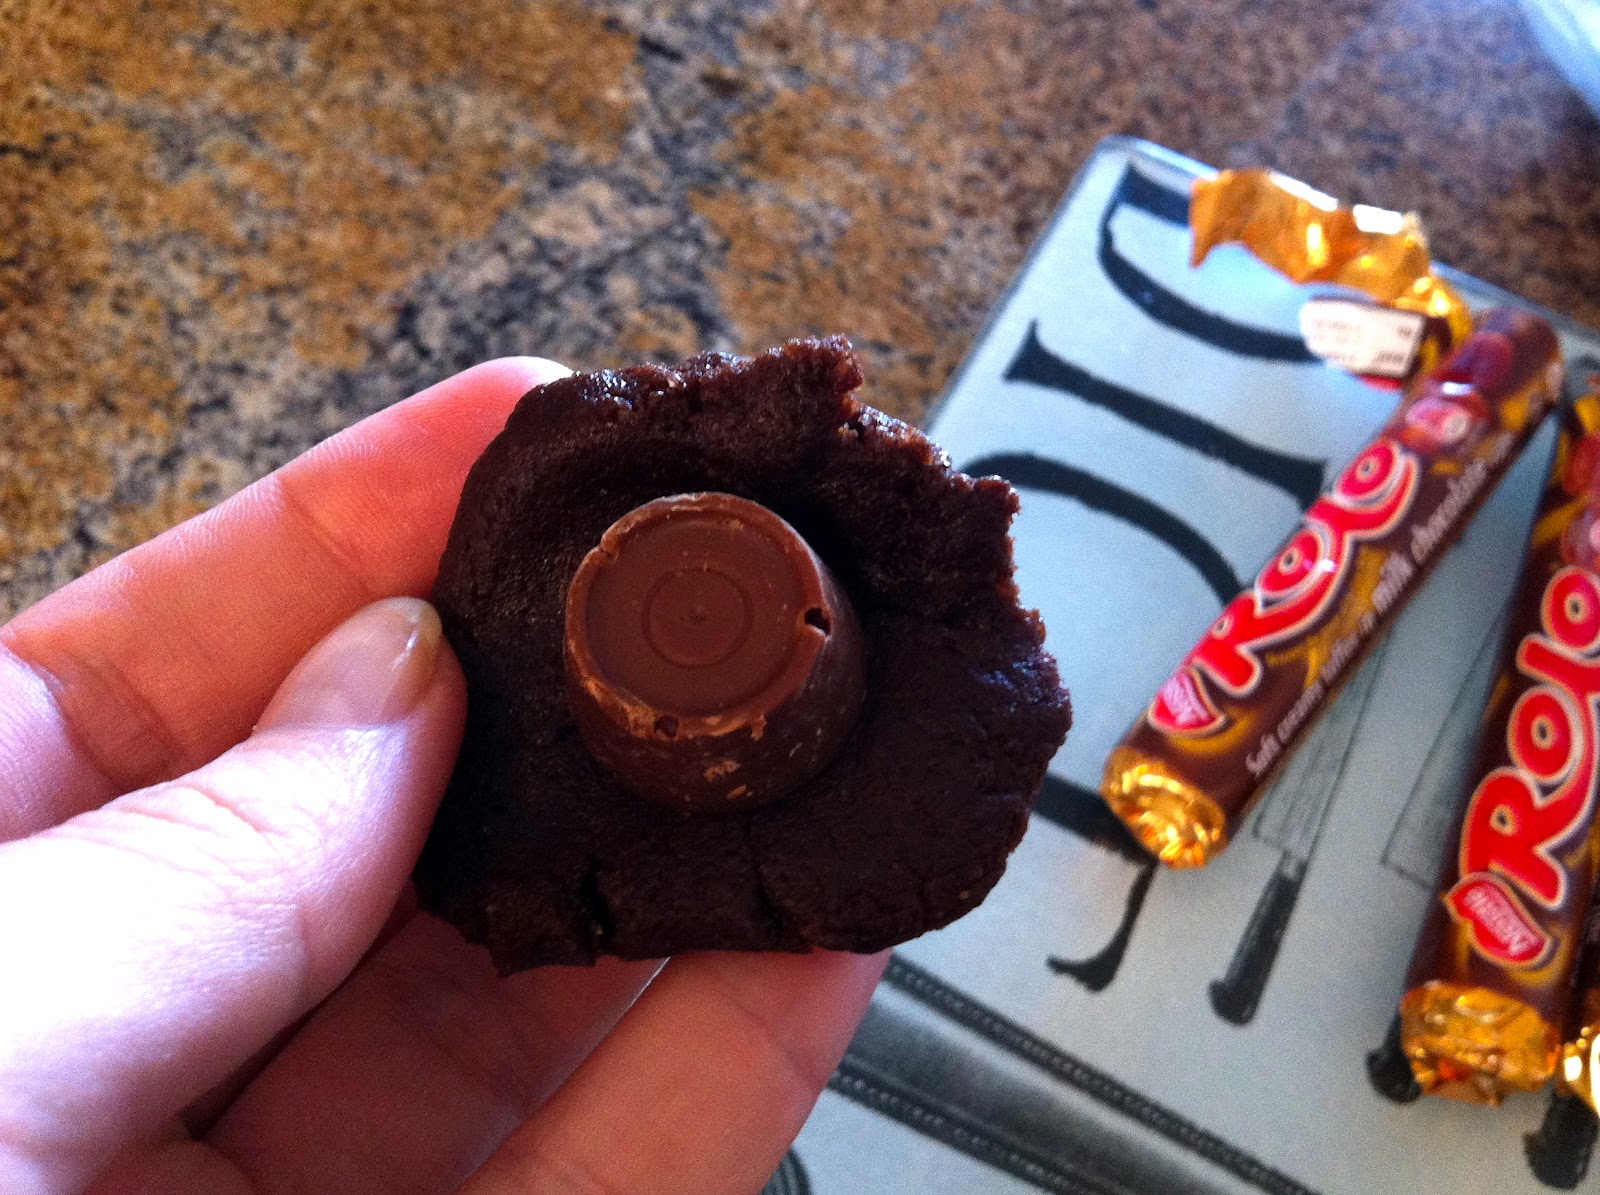
Rolo Chocolate Brownie Cookies

Ingredients
1 cup brown sugar
1 cup white sugar
¾ cup baking cocoa
1 cup butter
2 tsp vanilla
2 eggs
2 ¾ cup flour
1tsp baking soda
5 packs of rolos (50 rolos in total)
extra sugar to roll each ball in.

Directions
Mix sugars, cocoa, butter, vanilla and eggs.
Once mixed add the flour and baking soda.
Refrigerate dough for 30 minutes
Roll dough around each rolo, (it should now be about the size of a ping pong ball), and then roll each ball in sugar.
Place on a baking tray that has been covered with wax paper then bake for 8 – 10 minutes. They will start to crack when they are ready to be taken out.
Cookies will last if kept in an airtight container (assuming they don’t all get eaten immediately.)

Note: allow cookies to cool for 5 minutes before taking them off the paper. the rolo inside will be very soft, and when I took one off to soon the entire rolo dropped out and stuck to the paper...

Original recipe taken off the Big Oven iphone app.

Monday 17 September 2012

Royal Class


I have seen many of my favourite bloggers rocking the princess bun (such as Blair from Atlantic-Pacific) and proving it is no longer just for sweetheart ballerinas.

How to achieve the princess bun

You’ll need a men’s sock that you can cut. Because I have dark hair I went for a black sock. Blondes should probably go for white / beige.


 Cut the top of the sock off so it becomes more like a tube sock, then fold it until it resembles a scrunchie (Those nasty hair ties that were better left in the 80’s)

 Now with your hair in a ponytail, pull your pony through the sock, leaving the sock just at the end of your hair.


Roll the sock down, making the hair roll under and into itself. At first the hair might only be on one side, so just wiggle it all around the sock with each turn, making it cover the entire sock and starting to form the bun.


Keep turning until it gets down to your head. It should feel fairly snug and in place. 

 I accessorized with a little bow, and in an instant you’re ready to go.
Although this is super easy, it may take a few tries.
Have Fun!

Friday 14 September 2012

Thursday 13 September 2012

Market

A romantic, fairy-lit gem hiding amongst the busy streets, Market welcomes you with soft music and the offer of great wine and a delicious meal served under the trees…

We attended a work function at Market so only got to taste the canapés but based on the service and snacks, I would love to go back for a romantic dinner for two...

Market: 40 Marriott Road, Greyville, Durban.


Wednesday 12 September 2012

Heart & Sole


Louboutin got it right when he coloured the soles of our shoes. But why stop at red? Why not blue or pink or purple?
I may not be able to afford his heels, but I sure can add his chic appeal to my collection with boldly coloured soles.
What you need:
  • Primer
  • Normal acrylic paint
  • Modge Podge

Firstly paint the heels of your shoe with primer. The reason we add primer is because it prepares the surface. I kind of think of it as the bottom coat I apply below my nailpolish. (I did two layers)
Let this dry over night then paint with your colour of choice. I chose this light turquoise. 
Once the paint is dry you need to paint with a top coat. I had looked at a varnish but the lady at the hardware store warmed against it as the varnish would make my shoes slippery (good point) so I opted for modge podge, as it is still a sealant but being a glue it is less slippery. Modge podge layer over layer over layer. This is a very important step so don’t skip it. One layer vertical, one layer horizontal.
Then once you have done more layers than you believe necessary, leave to dry and voila, heels with a kick.  


 (footer: pardon all the puns, I just couldn't resist)